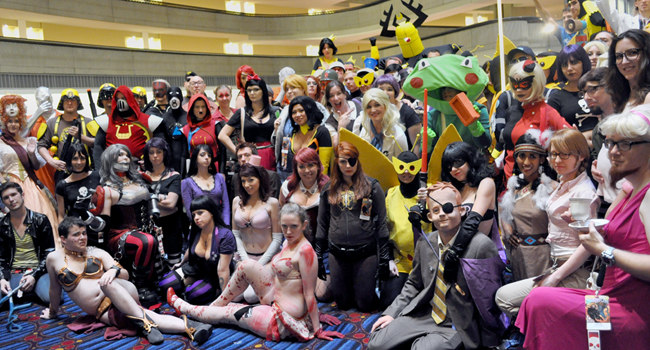
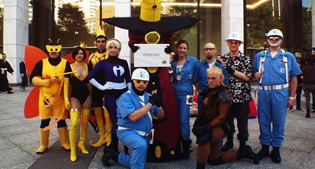
The Monarch Cosplay – Chest Armor

The Monarch’s Chest Armor is the defining piece of his costume; the Piece De Resistance. Or whatever. It’s the biggest piece to make (literally), the most challenging, and ultimately the single most important/obvious one.

Our Chest Armor is made of Wonderflex (WF). Making the Armor out of WF allows you to make it one large piece, with a single seam up the back – no complicated fasteners needed. The process involves making a fitting assistant or Clone of yourself, “sculpting” the armor Form on top of that, then curving the WF over your Form to create the finished piece.

Ductape, fiberglass, and sexy black paint.

WF is easiest to work with when you have something to shape it ON. You can work it by hand, but that gets tedious. The easiest way to do this for armor is to start with a torso. You could use a mannequin, or cast your body in plaster. Or you can easily and cheaply make a copy of your own by Cloning Yourself using duct tape and stuffing/batting. Just follow the instructions there – all you need is some tape and a henchman.

Once you have your Clone, sturdy him up a bit. We layered some fiberglass and resin on our Clone to make him more rigid, so he’d stand up to the constant maneuvering and abuse he was about to undergo, then painted the whole mess because we like black. Remember: Layering WF requires both heat and pressure, so you’ll be applying decent force to this thing. You don’t need to reinforce it, but it helps when shaping the WF, and will make your Clone last longer – focus especially on the upper neck/shoulders, and the chest. Don’t make the sleeves too long or stiff, since you’ll have to get the armor around them to get it off the Form later – just long enough to see where things should go. NOTE: Our first Clone got warped/smushed making our first set of Armor – the shoulders and neck were too fat to be useful and we recycled it into this one.

Cardboard and joint-tape Form.Now it’s time to make your Armor Form. You’re going to “sculpt” the shape of your Armor right on top of the Clone you just made – that way you know it will fit. The first time we did this, we used only cardboard, thinking we could smooth out the WF by hand later on. NOTE: This was a mistake – it is difficult and very time-consuming to change a small portion of a piece like this without altering everything around it. The second time we started with cardboard, and finished with a layer of Bondo Body Filler.

Start with cardboard for your basic shape. NOTE: If you want to make it easier to remove the Form from your Clone when you’re done, wrap the Clone in paper or plastic wrap first. Then go crazy with the cardboard and tape. Masking tape is perfect because it’s cheap, flexible, and you can cut/sand through it with ease if you need to later. Remember: You’ll want a decent amount of space inside the armor so you can move – things like bending and twisting your torso are painful/impossible with armor that’s too tight, so put some thickness in those first layers. Keep in mind what the final shape will be, but don’t hesitate to slap cardboard wherever you need it to make the shape look right. NOTE: Use tape to cover edges and gaps between cardboard pieces – the less space you have to fill with Bondo the better. We also used fiberglass drywall-joint tape to make the Bondo stick better – this is strictly optional.

When you think you’re close to the shape you want, draw the final outline directly on your cardboard Form. Cut off any extra cardboard with a box cutter, making sure to reattach anything that comes loose. NOTE: We did not do this, and we were forced to go back after starting with the WF and cut clean edges so we could properly shape our Armor.

First coat of Bondo, unsanded.At this point you should have a rough cardboard version of what your Armor will look like. It should be slightly smaller than you want the final piece to be, because you are about to slather it with Bondo. NOTE:Gauging exactly how much cardboard versus Bondo to use is tricky. Ideally you’ll use just enough Bondo to smooth everything over and create the elegant, complex curves you want. In practice this rarely happens. You will almost certainly have areas with too much cardboard, and areas with too little.
After first round of sanding, front.Although you will need a lot of Bondo (we used nearly a gallon), work in small batches. Remember: Bondo hardens faster with sunlight and heat, so work away from both. We recommend using the actual Bondo/3M brand spreaders you’ll find wherever you buy your Bondo – they’re flexible, and make curves easier than rigid spreaders will. NOTE: Don’t try to get everything perfect with the first layer. As we said, it’s likely you’ll have some areas that need more work than others. Get a solid coating of Bondo on everything first, then go back and add more where you need it.

Once the Bondo looks good, it’s time for sanding! You really, really want a power sander. Even if it’s a crappy square sander from a swap meet or garage sale, get one. Start with some really heavy 60 grit sandpaper. Depending on the shape of your Armor, and how smooth you made your Bondo, you might want to start with a heavy-duty rasp/file. Go crazy – shape the Bondo down to where you want it, using whatever tools are easiest. We used a combination of heavy rasp, Dremel, square and random-orbital sanders.

Completed Armor Form.When you have the shape almost perfect, switch to a higher grit sandpaper, like 220. The Bondo doesn’t have to be paint-grade smooth, but the WF will pick up a surprising amount of detail when you heat it up as much as you’re about to do.

You might sand through the Bondo and expose your cardboard, but still want to carve the Form down farther. Just cut out the exposed cardboard, plus a healthy chunk of the area around it, with a box cutter. Then put more Bondo in the gap you made and continue sanding. If you find areas/gaps that should stick out more, just add more Bondo (and/or cardboard) and keep sanding. You can repeat this process infinitely, or until you’re satisfied with the results.

First layer of WF.When you’re happy with the Form, it’s time for the WF. NOTE: If there is any exposed cardboard or tape, cover the Form with tin foil. WF gets very sticky when hot, and though it will peel off Bondo fairly easy it won’t come off cardboard or paper (like masking tape). Tin foil peels right off, as does plastic wrap – but plastic wrap can’t withstand the heat. We recommend clearly marking things like center lines before you get started – it makes it easier to get things symmetrical later.

WF now comes with a “smooth” side and a textured side. It sticks to itself regardless of which side you use. Make the armor two layers thick – it will be sturdier and hold its shape better. We recommend putting the smooth side in for the inner layer, and out for the outerlayer. This will make it easy to paint, and leave fewer rough edges to snag clothing/skin on.

WF seams, close up.Start with a great big piece of WF for the first part. You can make a rough pattern using paper if you like. Remember: WF stretches in proportion to its size, so  big piece will stretch a lot. Start from the front – you want the front to be the smoothest and most polished looking. Work your way around, stretching, smoothing, and pressing the WF onto your Form. Cut and trim as needed to make things lay smoothly. Tack edges down with masking tape if it moves too much. With patience and effort, you can make the WF exactly match your Form.

After the front piece is done, do the same from the back, overlapping the pieces when you get to the sides. Trim the edges of both halves before overlapping – this will create cleaner lines later on, and make any extra smoothing easier. When starting with a new piece of WF, start forming either from the center (if it’s a new section), or from the edge you’re overlapping (if continuing from an adjacent piece). If you don’t, you may end up with wrinkles at the overlap if you have to stretch the WF further. NOTE: Wrinkles are a pain to fix, are ugly, and create extra-stiff areas – usually where you don’t want them; avoid them.

Continue like this, adding new pieces of WF until the whole Form is covered. Add extra layers in high-stress areas like the shoulders and the center of the chest. Remember: WF will bond to itself when hot – if both layers are hot enough they fuse into one solid layer. Reinforce any spots that seem weak, or where you cut sharp corners – like the front “V” shapes. We recommend trimming and rolling/folding the edges under – it adds another layer of stability, and creates a nice smooth appearance. We shaped the front edges to be almost triangular, making the armor look much thicker than it actually is.

Smoothing second layer WF.NOTE: WF will pick up enough detail from sub-layers that edges will show through to the top layer – be careful when layering. To hide/smooth any lines from hidden layers/edges, get the area good and hot and roll over it with something like a pen – a sharpie works well because of its slightly curved shape.

NOTE: WF normally retains heat, and Bondo acts like an insulator – it’s convenient to have a fan handy to cool off the areas your working on as you hold them in place. The most time-consuming aspect of using WF, especially on a large piece like the Armor, is waiting for one section to cool so you can move onto the next one.

When all the WF is done and completely cool, it’s time to take it off your Form. Find the center line on the back of the piece – this is where you’ll cut. NOTE: This is one place where it’s especially important to double-check everything. Cut completely through all the layers of WF from the collar to the bottom edge. Double check that the layers here are completely bonded to each other – you don’t want them to separate when you attach the fasteners.

Now comes the moment of truth! Peel the WF off your Form. It will stick, so proceed slowly. A flexible putty/spackle knife may be helpful to pry loose any especially stubborn parts.Remember: WF loses its flexibility if it’s especially thick – places like the shoulders can actually crack/break if you’re not careful. NOTE: If anything breaks, don’t worry – enough heat and pressure and the edges will melt right back together, and some WF scraps underneath will ensure the area is solid.

Completed WF Armor.When the whole piece is loose, it should come right off the form – some bending and contorting may be required. When it does, congratulations! You now have a piece of armor that will fit you perfectly. Go ahead and try it on to be sure, but have a henchman handy – getting back out can be tricky.

The next stage is painting. You’ll prime your everything first. Use a flexible automotive High Build primer, coupled with a flexible Adhesion Promoter. Bulldog makes both, and they’re commonly available at auto supply stores. The Adhesion Promoter ensures the primer bonds with the plastic of the WF and can flex/bend adequately, and the High Build primer will make it easy to get the Armor looking glossy-smooth. There are cheaper High Build primers (Home Depot sometimes carries a Rustoleum version), but they don’t have the flexibility and bonding strength of good auto primers. Remember: The quality of your primer is what determines how well the surface coat sticks to your final piece.

WF Armor, 3/4 view.Coat everything with primer, including any parts of the inside which can be seen through arm holes, from underneath, etc. We painted everything to be safe. At this point, check that everything is smooth, with no visible seams/lines – edges and overlapping pieces are prime locations. Any areas that need work can be further smoothed with a thin layer of Bondo.NOTE: It is easier to see imperfections after everything is primed the same uniform color, which is why you’re doing this now. When it looks OK, apply more primer until you have enough paint to sand everything smooth.  Once the primer dries, sand it lightly until it feels sleek – start with 120 grit, then move on to 220, and finish with 300.
Letting the paint dry.Dust/clean everything thoroughly, then paint it. There is a sparse selection of yellow aerosol paint – Rustoleum and Krylon each make 2 colors. Montana Gold (available at Blick and other art stores) comes in about a dozen shades, but is only available in matte finish. We used Krylon gloss yellow. It goes on very, very thin, but dries to the touch and is repaintable in about 10 minutes. Be patient, and expect to use several cans (we used 3). It will take many coats to get a consistent, solid yellow, but the finish is very smooth and durable.

Once all the paint is fully cured it’s safe to move on to attaching fasteners and harness. Our armor uses a separating zipper to close the back seam, but you can also use velcro or something similar. NOTE: Make it simple – someone else will be strapping you into your armor. Barge Cement (available at hardware and craft stores) works excellently, and will bond to anything you use here.

Foam and Bondo shoulder form.Unless it is secured to your body, the Armor will ride up to you neck. To keep it in place, we snap it to an elastic harness straps around the chest. We started with a set of hockey pads found at a second-hand sporting goods store, cut off all the plastic and extraneous bits, and sewed heavy-duty snaps to the shoulder/neck portion. Then we used Barge to attach the other half of the snaps to the underside of the armor. You could create a similar setup from scratch using elastic and velcro. NOTE: Double check that everything lines up correctly before attaching anything – your Clone will be useful here.
Final WF Chest Armor.The shoulder pads are made of WF, following the same method used for the Armor. Except instead of using cardboard we used expanding foam insulation (comes in a can at hardware stores), which we carved with a serrated knife, then covered with Bondo. It was easier making the curve of the shoulders this way than cardboard would be. They are attached directly to the Armor with a piece of yellow fabric – in our case scraps from our boots, so it matches everything else. The wings are secured with a single strip of velcro, glued on with Barge. You can make the Monarch logo with vinyl decal material from craft stores, though we had ours professionally printed from an Adobe Illustrator image we drew. In fact, you can ask Jennifer Allman to print one up for you, too – she has them ready to order.

That’s it, your Armor is done! Now get suited up and go show the world just how malevolent you truly are!

Written by Steven Meissner, SoloRoboto Industries


Discuss this story in our Venture Forums! Follow @VentureBrosBlog on Twitter and be sure to “LIKE” us onFacebook for the latest Venture Bros. news!

[Venture Bros. Blog]

The Monarch Cosplay – Golden Crown

The Crown was very straightforward, and the simplest of The Monarch’s pieces to make. Notice we did not say easy – it took plenty of time, but was not intensive in any way. Essentially, you will be making a cone, sculpting some shapes on top of it, and painting the whole thing.

NOTE: We have made 3 Crowns (and three cowls). We will be detailing the process for 2 of them here.

METHOD 1: Wonderflex Method

Simple paper pattern.Simple paper pattern.

The first step is to make a paper prototype/pattern. This is simple, but important, especially when using materials that are costly like Wonderflex (WF). Start by making a cone by rolling up some paper – newspaper works great as it’s large and stiff, but anything can work. Get the cone shape right first – this needs to be the right size on the bottom (so it fits your head) and the right height and shape (so it looks good). Remember: You’ll be cutting lots of bits out, so it will look substantially smaller/thinner later. Note where the paper overlaps for when you make your final pattern. Now draw the shape you want the crown. Before you cut it out, reinforce the skinny parts so they stand up and you get an accurate idea of the final effect. We covered ours with masking tape since we have a lot of that lying around. Then cut it out and try it on. It took us several tries to get right.

Paper crown prototype.

Now that you have the exact shape you want, it’s time to make it out of WF. Trace your pattern onto some WF and cut it out with scissors. Don’t cut out the points of the crown, just the basic cone (the shape of your pattern before you drew the points of the crown in). When you heat up the WF to bond the edges together and make it round, the points are going to wilt, bend, and generally cause you all kinds of grief if they are already separated. To avoid that, cut them out after you get the basic shape of the crown together. Remember: You can always cut off more WF if you want – it’s harder to put it back on.

Pattern traced onto WF cone.

Next you’ll sculpt the spines and points of the crown. First reinforce/thicken the spikes themselves, as well as the round bits, with scraps of WF. This makes the crown more stable, and gives it some thickness. To smooth out the spines, we used Apoxie Sculpt (AS), because 1) we had some lying around, 2) we have lots of experience with it, and 3) we love the stuff. AS is a 2 part epoxy putty that handles like oil based clay, and hardens like plastic. Work in small batches, layering it on like you would clay, until you have the shape you want. You can also wait for it to dry and then sand/carve it until everything is perfect.

Next, painting!

METHOD 2: Drink Method

Rough AS & cardboard.

It so happens that a plastic big gulp cup is the same size and shape as The Monarch’s Crown should be, making it the perfect thing to sculpt a crown on. However, the Crown is not a simple cone – it curves gently from the base to the points. To make sculpting this curve easier add several layers of cardboard both at the base and where the points would be. This also provides an easy way to keep things uniform.

Next, sculpt the surface of the Crown out of Apoxie Sculpt. Apoxie Sculpt (AS) is a 2 part epoxy putty that handles like oil based clay, and hardens like plastic. NOTE: You are still working on a complete, unmodified cup. Once you are satisfied with the shape of the Crown, let the AS cure, and then cut off the extra portions of the cup.

All cut out.When you do this, portions of the cup may peel away from the AS and the cardboard you used to create curves. If so, cut out the cardboard you see, hot glue the cup pieces back in place, and fill in the gaps with more AS. To make the Crown really look good, add more AS to the back of the spines and points so it has a more 3 dimensional quality.


After all the AS is cured (a few hours, or overnight to be safe) it’s time to sand it. Use 120 grit sandpaper to start, and 220 to finish.  A power-sander and Dremel will make this infinitely faster, but you’ll have to do much of it by hand regardless because of all the odd shapes. Sand until things are as smooth as you want them, then clean everything off – you want a good clean surface to paint. Since everything is plastic it’s safe to wash it with soap and water.

Next…

PAINTING

WF & AS Crown, primed.

If you followed the Drink Method you can just prime and paint. If you used WF, you have a few options here.

Option 1. Prime it with several layers of primer  – it’s going to take some serious coating, sanding very lightly in between. If you sand too hard you’ll go right through the paint and actually fray the WF – making the texture/fuzziness worse. You can see in the pic how the texture of the WF shows through paint.

Option 2. Gesso. We know many people who have had success with using this stuff to smooth out WF. NOTE: For various reasons we’ve never tried it ourselves, mainly its reputation for cracking and flaking off WF. Since we typically use WF when we want flexibility, that’s a deal breaker, though we’ve heard reports that this isn’t always true. In any case, you don’t care about flexibility here so it should work fine.

Option 3. Prime it with a few layers of High Build primer. You can find this at auto part stores or, if you’re lucky, Home Depot (our local store carries Rustoleum “Filler Primer”, and it is much cheaper than anything else). Unlike other paint, High Build primer is designed to very quickly build on itself (hence the name), becoming thick and easily sand-able. It may not look like it’s changing anything as you layer it on, but when you start to sand it you’ll quickly see the difference.

Final WF Crown & Ears.Once you’re happy with the texture you have, you can paint your Crown its final color. For our first version, we spray painted all the pieces yellow, then clear coated them with Gloss polycyclic sealer. NOTE: A clear coat is not necessary if you can find a good gloss yellow that matches your fabric (Krylon and Rustoleum each carry exactly 2 shades of yellow). Montana Gold (available at Blick and other art stores) sells paint in a near infinite variety of colors, but they are matte (flat) finish. The polycyclic will also make your piece more durable.

Finally, attach it to your cowl! There are several ways to attach the Crown to the cowl. You can use velcro, snaps, sew it to the cowl directly, or simply hot glue it in place – sadly, pinning it in place just isn’t practical. Hot glue works very well, but will ruin the cowl – we don’t recommend it if your cowl is attached to your bodysuit and you ever want to wash it. Velcro is the most convenient, since you can take the Crown off if you want. Glue one half of some velcro strips to the Crown, and stitch or glue the other half to the cowl. Use as much velcro as possible – if you can cover the whole area inside the Crown there’s almost no chance of it coming loose. With our first Crown, we used 4 small squares, one at each compass point, and the Crown gradually pulled loose from either the front or back piece over time; we had to have another person stick it back down periodically… not exactly Menacing. We have hot glued the crown on with great success, and prefer this method when using a separate hood. The only trick is to stretch the cowl somewhat before gluing the Crown in place, otherwise it will flop around a lot. NOTE: When using hot glue on WF, be very careful, as the glue is hot enough to deform the WF.

The Ears are layered pieces of cardboard with AS on top, smoothed and sanded to shape. The forehead Gem is just AS. They are painted the same as the Crown, and attached to the hood.

That’s it! Put that baby on and throw yourself a party, as only Royalty can.

Written by Steven Meissner, SoloRoboto Industries


Discuss this story in our Venture Forums! Follow @VentureBrosBlog on Twitter and be sure to “LIKE” us onFacebook for the latest Venture Bros. news!

[Venture Bros. Blog]

The Monarch Cosplay – Knee High Boots

Making these thigh high, leg hugging boots isn’t nearly so daunting as it seems. You’ll be making what are known as “boot covers.”  In this case, permanent covers – essentially fabric sleeves that fit over your footwear, turning them into something much more diabolical. Additionally, you will be making curly toes to really set your boots apart.

boots01

There are a few things to do before you really get started.

First and foremost is to find your shoes. Everything else will depend on what shoes you choose. I chose cowboy boots because 1) they have the exact heals the Monarch’s boots do, and 2) their toes most closely resemble those of the final piece. If you can find boots with really pointy/curly toes, so much the better. Mine were the best I could find in my size, and they were comfortable – always a bonus.

Additionally, you’ll need to get some cheap fabric to make patterns with. I strongly suggest finding something that stretches as much like your final material as possible. This will make your life far easier.

Boots, post-butchering.

Depending on what you chose for shoes, you may have to butcher them. I did because 1) the original shape was not nearly form-fitting enough, and 2) I didn’t think I could slide into and out of them unless I minimized the stiff part as much as possible. I was careful to not cut off so much that my feet could accidentally slip out of the boots. This meant lots of trimming, in very small increments. Remember: You can always cut more off later.

Cleaning makes a difference.

Thoroughly clean your shoes. You will be gluing fabric (spandex and/or vinyl) as well as rigid materials (Wonderflex, or WF) to them, and possibly painting parts of the boots directly. In each case you need the cleanest surface possible for maximum bonding. I scrubbed them thoroughly with a rag soaked in Denatured Alcohol (available at hardware stores). This removed lots of dirt, grime, dye, shoe polish, and the topmost layer of rubber from the soles… I tend to be overly thorough. The boot on the right has been cleaned, the one on the left has not.

WF Toe taped in place.The next step is to make the curly toes. I used WF for this (they were the first thing I ever made using WF, and each toe is substantially different as a result). It is a good idea to make a rough draft out of paper. Simply use whatever you have (newspaper is always good) and twist it into the basic cone shape that you want. Tape it to the boots as you work if you want to. It’s difficult to make an exact pattern here, so you’re aiming for an approximate idea. Remember: WF stretches and bends in ways paper can’t, so some parts will be smaller, some will be larger. After you have that, use it to make your first rough shape out of WF. You will have to cut, trim, bend, stretch, and generally do a lot of finagling to get those toes the shape you want. You will have lots of wrinkles and bends. Don’t worry too much about getting them smooth or nice looking. NOTE:Keep all your WF scraps – you’ll use them, especially on pieces like these toes.
WF Toe - wrinkles.

Once you have the basic shape, it’s time to fine tune it. Tape the WF toe directly to the boot where you intended to attach it. Molded the edges of the WF to fit into the groove between the sole of the boot and the leather, to give it a better hold. Remember: Periodically check how the Toe will work when you walk – make sure it won’t get knocked off when you roll your foot forward, and that there’s an allowance for how much the top of the boot stretches with your foot in it. NOTE:A little tightness here will haunt you down the road. I spent as much time shaping the WF to match the boots as I did on getting it into the curl shape, if not more. Next, smooth out and reinforce the toes as much as possible with more WF. Use the scraps you saved to cover up any wrinkles or weak points.

What'd we say about scraps?

Remember: The smoother you can make the Toes now the less finish work you’ll have to do to make them really nice later. However, keep in mind the thickness of the fabric that will go over them – I put more effort into this part that was strictly necessary.

OPTIONAL: After the shaping was done, I further smoothed out the Toes. This might not have been necessary as I later glued fabric over the top, but it made the final piece look more polished than it otherwise would have.Use acrylic caulking to smear/spread over the seams and dips (available at hardware stores – it doesn’t matter what kind; cheap is fine). It is possible to sculpt caulking almost like clay, if you are careful and patient. Keep some water handy to get your hands wet, and smooth it out as it starts to tack up/dry. A hairdryer or heat gun can help this process along. NOTE: Be careful not to get things too hot – the caulking will bubble, or the WF will deform again.

WF Toes blued to Boots.The final step is to glue the Toes to the boots. Use ShoeGoo (available at hardware stores) for this. There are many kinds of “Goo,” but there is one specifically made for shoes. It’s for reattaching or reconstructing soles of shoes, and bonds to all kinds of things, especially leather and rubber. Just follow the directions, and use it liberally.Smear it all over the toes, you don’t want to take any chances. Unlike other adhesives (such as Barge Cement) ShoeGoo is incredibly thick – useful in this case for filling the unusual shape under the Toes. Follow all instructions carefully, allowing it time to cure – you don’t want to damage anything and have to repeat it. Mine are nearly indestructible – I could literally kick rocks and tires and other people and do no damage to the boots (or my toes). You’ll be grateful for this the first few times you wear your boots and people/things constantly get hooked on those points.

For instructions on the actual Boot Covers, I’ll refer you to the tutorials I followed myself:

Final spandex/vinyl Boots.You’ll be making permanent covers. If you can find stretch fabric you can avoid zippers and extra sewing. The fabric I used the first time is a stretch fabric called “liquid vinyl”; when I remade them I used a “4-way stretch PVC.” I never hemmed the top of the boots. Instead I folded the edges inside and fabric-glued them in place to avoid extra seams. The other benefit of stretch material is it allows you to make the boots completely form-fitting, as the Monarch’s are. The top most part of the boots should be a little loose to look accurate.

NOTE: I safety-pin the boots to my bodysuit to keep them up, though you could use fabric interfacing to make the tops stiff enough to stand on their own; originally mine were tight enough to stay in place, but they’ve gotten stretched over time.

Takes a licking, keeps on kicking.When attaching the fabric covers to the boots, I recommend using Barge Cement (blue tube, available at hardware stores). It doesn’t bleed through fabric as much as ShoeGoo does, and is less thick/goopy – both traits you want at this point. Lastly, touch up any areas where the original boot still shows, or where the glue may have stained the fabric despite your best efforts. I used spray paint, though you could also use more fabric.

That’s it, you’re done! Make sure to let everything dry/cure properly, then go participate in some organized havoc.

Written by Steven Meissner, SoloRoboto Industries


Discuss this story in our Venture Forums! Follow @VentureBrosBlog on Twitter and be sure to “LIKE” us onFacebook for the latest Venture Bros. news!

[Venture Bros. Blog]

The Monarch Cosplay – Wrist Shooters

The Monarch’s Wrist Shooters are a deceptively simple piece, even though they don’t actually shoot (yet!). There are a startling variety of ways to go about making them – we’ve seen fabric, cardboard, pieces of PVC pipe, plastic cups, you name it. we’ll be detailing the 2 methods I’ve used.

METHOD 1: Cone & Tubing

This really only works if you want Wrist Shooters resembling those from season 1 or 2. In later seasons they took on a curved, pointed, tapered shape that’s incredibly difficult to reproduce using this method. In fact, we don’t recommend repeating our steps – it’s a pain in the ass, and the Wrist Shooters won’t stand up to repeated wear and abuse without maintenance. However, with only slight changes (which we’ll point out) it’s a simple, cheap, and easy to follow method.

Basically, you take a cone, attach tubes to it, and paint it. The rest is just details.

First off, you need a cone that fits correctly around your forearm. We made ours out of Wonderflex (WF). NOTE: Do not do this. You can easily use cardboard or something similar. We recommend the dense, non-corrugated kind, like from a cereal box. This is easily bent into the proper curve – just be careful not to crease it, as creases are weak points. Sandwiching a healthy dose of hot glue between a second layer of cardboard will make the Wrist Shooters hold their shape indefinitely while still remaining flexible. NOTE: Some thicker (around 1/8″) non-corrugated cardboard is actually many layers of  paper, and these layers peel off when things glued to them undergo any kind of force – things like fasteners to hold the Wrist Shooters closed.

Remember: Proper fit is extremely important. Do not make the Wrist Shooters too small. Our first set cut off circulation to our thumbs, putting them to sleep. The first Con we wore these we didn’t notice, and now have permanent nerve damage in our left thumb – we only have about 60% feeling in it 3 years later.

Simple paper pattern.If making the cone from scratch, make a pattern out of paper first. This is much easier to alter and more accurate than using un-curved cardboard. Grab some newspaper or unsolicited mail ads, wrap it around your arm, tape in place, and draw the shape you want. A cone is not simply a twisted rectangle – both the top and bottom lines curve. Then trace your pattern onto your final material.

Another option is disposable drink cups – plastic big gulp cups are especially suited to the task and will take lots of abuse. NOTE: This option has worked very well for others, and we recommend it if you can find cups that fit.

A series of tubes.Next, find some tubing that is the right size. We used flexible rubber tubing designed for aquarium/plumbing work because 1) it was the best match for the size we wanted, and 2) we intended to make the back end of the Wrist Shooters taper inward. There were several downsides to the flexible tubing:


  • It’s sold in rolls, and getting it straight was a nightmare;
  • The rubber it’s made of resists sticking to anything, including hot glue and paint;
  • Over time, the natural curve of the tubing reasserts itself and it comes loose;
  • Contact that would only scratch rigid tubing instead bends it, causing things to flake and come loose.

NOTE: The problems of keeping the tubing straight and its coming loose could likely be avoided if glued to a rigid surface – such as cardboard or a cup; WF deforms under hot glue, causing a whole cascade of problems.

Use rigid tubing if you can find it in a small enough size. NOTE: If you plan to make your Wrist Shooters curved like they are in Season 4, aluminum tubing is a good choice; while still sold in rolls, it is quite easily bent to the desired shape, is as light as PVC, comes in several diameters, and is still quite cheap (around $0.30/foot).

This is why we don't use WF.Once you have your tubing, and have all the pieces cut to the right length, glue them in place. Hot glue is typically best here, though certain plastics/rubbers may not stick to it well. In that case, either clean everything with Denatured Alcohol (available at hardware stores) to remove the top layer of oil, or switch to a different adhesive. Hot glue is great for its incredible ease of use, and immediate results. Remember:You can’t glue the pieces parallel to one another because the Wrist Shooters are cone-shaped – lay them out so you know where they’re going first. A few minutes of preparation here will save you hours of headache later. Draw some guidelines for yourself.


OPTIONAL: At this point, you can move on to painting if you’re happy with the Wrist Shooters’ shape. Or you can do what we did and fill the gaps between the tubes. This part is as easy or time-consuming as you want it to be.

WF Bracer, assembled.Using household caulking (cheap is fine) fill in the gaps between the tubes. NOTE: Silicone caulking is more flexible, but very difficult to paint; Acrylic caulking is flexible enough, and paints easily. Smooth the caulking out with a finger. Keep some water and a towel handy – caulking smooths easier with some, not a lot, of water, and keeping your fingers clean helps. You can sculpt caulking almost like clay if you are patient – let it get tacky/slightly dry then shape it; a hairdryer helps with this, just don’t get the caulking so hot it bubbles/warps. The Monarch’s Wrist Shooters have a hard, crisp groove between tubes – this is difficult to reproduce with caulking, but possible.


You can also use clay of some kind. This makes creating those lines easier, but will make the Wrist Shooters very rigid – which may cause problems with getting them on and off. Make sure the clay you use won’t crack over time – Apoxie Sculpt is perfect here as you can sand/carve it further once it cures.

Final WF Wrist Shooters, 3 years later.Alternatively, ignore those grooves and make the Wrist Shooters smooth, as we did.

The last step before painting is to fasten them closed somehow. We used elastic, stretching it taught and gluing it in place so that it would pull them closed. Other options include rubber bands, velcro, snaps, magnets, or clasps like those used in clothing – your method will depend on the structure of your Wrist Shooters. Get creative! Whatever you use, make sure it’s firmly attached and won’t come loose.

NOTE: Attach the fasteners before painting – many adhesives interact poorly with paint, especially spray paint.

Then it’s on to painting!

METHOD 2: Resin Casting

Unlike Method 1, this is not something everybody can do. Creating pieces from urethane resin is an advanced process, and takes much more time, skill, and money than Method 1.  We won’t address the details of mold making or casting here – the web is full of resources on that. We recommend starting with Smooth-On’s How-To’s.

Plaster wrapped in plastic.To begin, create a positive sculpt of the Wrist Shooters – something to make a mold of. To make sure it will fit properly, sculpt this on a copy of your forearm. We made a plaster cast of mine because we had some plaster that we wanted to get rid of. Tape down some plastic wrap or similar to sculpt on – when you’re done sculpting it will allow you to slide the Wrist Shooter off the arm. To leave some wiggle room between your arm and the Wrist Shooter, start with a base layer about 1/8″ thick which will act as “air” later when you mold it.


AS base coat makes "space."Create the basic shape using bendable, rigid tubing – aluminum works well and is cheap (about $0.30/foot). You only need 4-5 feet, depending on the size of your Wrist Shooters. Cut the tubes to the right length – a little shorter than the total length of the Wrist Shooters. A pipe cutter is the easiest way – we found one at a swap-meet for a dollar, though a hacksaw also works. Remember: The Season 4 Wrist Shooters are tapered and come to points at the back -  leave space for that.


Tubes in place.Make sure each piece of tubing has the curve you want the final piece to have, then attach them in place. You could glue them on directly, but if you make a mistake with alignment you’ll have to undo and then correct it. We used Apoxie Sculpt (AS). AS is a two-part epoxy clay that handles like Sculpey or similar clays, but cures into plastic. It is also very sticky, so it works like glue. Using AS allows you time to adjust each tube as you go, and to step back and readjust any of them you’re not happy with. The down side is you have to work in batches – you can’t go all the way around the arm without bumping other tubes and moving them out of alignment. Do a chunk, let the AS cure, then come back and do more.
Sculpted AS points.This creates a solid foundation to work with. Next you’ll be sculpting the space between the tubes, as well as the points at the back. We used AS for all our sculpting because 1) we knew we could further smooth it with sandpaper and a file later, and 2) we wanted the option of removing the Wrist Shooter from the arm underneath to make a two-part mold.
Starting to take shape.After everything is sculpted to your liking, sand the AS until it’s as smooth as you want. Start with 120 grit, and finish with 220 or 300 grit sand paper. Files and rasps help tremendously with getting those lines nice and sharp. We used a hacksaw blade to score the seams between tubes before attacking them with a file.
First round of sanding.When you have your positive prepared to your liking, coat it with a layer of primer. We use High Build primer because it fills in any remaining imperfections, and sands easily to a perfectly smooth finish. High Build primer is available at auto supply stores, or if you’re lucky, Home Depot has Rustoleum Filler Primer (which is much cheaper).


Removed and sanded.Next, create your mold. We use silicone for our molds. We made a one-part mold and slush cast the resin. Then we sanded the resin pull using a Dremel until it fit. We have plans to make a two-part mold, and cast the Wrist Shooters out of expanding foam for increased comfort, fastened along a seam with either velcro or magnets.
Primed and ready.

The downside to resin is that it is mostly rigid – we can barely get our Wrist Shooters on. Heating the resin with a hair dryer softens it slightly, and they can be bent to make removing them easier. Because they are rigid, we don’t need fasteners to keep them in place.

Next…

PAINTING

If you followed Method 2, then simply prime and paint them as you would any other resin piece.Remember: Always let resin cure fully, and prepare it properly – we failed to do so, and the results can be seen in the images. If you followed Method 1, you have a few more things to consider.

Always prime your pieces – it helps paint stick, and generally improves the appearance of the final coat. Make sure whatever primer you use won’t react adversely with your piece – some plastics and rubbers are very finicky. Try it on some scraps first. We prefer the Rustoleum brand of primers, especially their Auto and Filler primer – plus they’re available at Home Depot for cheaper than other brands elsewhere.

Final resin Wrist Shooter.Cardboard will cause issues if it’s not the glossy kind. When painted, the tiny fibers you otherwise ignore will stand out, making the surface look fuzzy. Prime, sand, and prime again until the fuzziness is gone.


If you’ll have to bend your Wrist Shooters a lot to get them on and off, try to use a paint with some flexibility – avoid enamels; they are brittle when dry. Most spray paint is moderately flexible because it bonds so well to the material underneath, but will still crack if bent repeatedly. A top coat of clear polycrylic sealer will delay this, and make your piece more resistant to damage. If you need a lot of flexibility, Michael’s craft stores carry spray paint designed for painting fake flowers. It can even be used to paint boots, gloves, and belts without issue.

That’s it! Unless you want to put little lasers on your Wrist Shooters…

Written by Steven Meissner, SoloRoboto Industries


Discuss this story in our Venture Forums! Follow @VentureBrosBlog on Twitter and be sure to “LIKE” us onFacebook for the latest Venture Bros. news!

[Venture Bros. Blog]

Venture Bros. Halloween Costume Contest 2011

Submit your Halloween photos in our Venture Bros. Costume Contest! Best Venture Brothers themed costume wins a very special prize from the Venture Bros. Blog. To enter, upload a picture of your Halloween costume to our Facebook Wall. Deadline for submissions is 12 midnight, October 31st. Contest winners will be announced on November 1st. Check out last year’s costume submissions in the gallery below!

» Upload your Venture Bros. Halloween Costumes on Facebook


Discuss this story in our Venture Forums! Follow @VentureBrosBlog on Twitter and be sure to “LIKE” us on Facebook for the latest Venture Bros. news!

[Venture Bros. Blog]