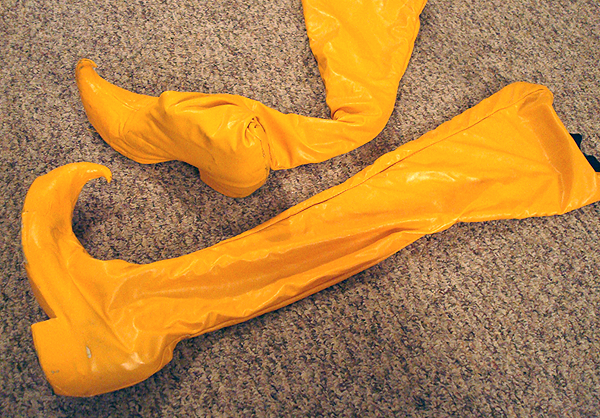
The Monarch Cosplay – Knee High Boots

Making these thigh high, leg hugging boots isn’t nearly so daunting as it seems. You’ll be making what are known as “boot covers.” In this case, permanent covers – essentially fabric sleeves that fit over your footwear, turning them into something much more diabolical. Additionally, you will be making curly toes to really set your boots apart.
There are a few things to do before you really get started.
First and foremost is to find your shoes. Everything else will depend on what shoes you choose. I chose cowboy boots because 1) they have the exact heals the Monarch’s boots do, and 2) their toes most closely resemble those of the final piece. If you can find boots with really pointy/curly toes, so much the better. Mine were the best I could find in my size, and they were comfortable – always a bonus.
Additionally, you’ll need to get some cheap fabric to make patterns with. I strongly suggest finding something that stretches as much like your final material as possible. This will make your life far easier.
Depending on what you chose for shoes, you may have to butcher them. I did because 1) the original shape was not nearly form-fitting enough, and 2) I didn’t think I could slide into and out of them unless I minimized the stiff part as much as possible. I was careful to not cut off so much that my feet could accidentally slip out of the boots. This meant lots of trimming, in very small increments. Remember: You can always cut more off later.
Thoroughly clean your shoes. You will be gluing fabric (spandex and/or vinyl) as well as rigid materials (Wonderflex, or WF) to them, and possibly painting parts of the boots directly. In each case you need the cleanest surface possible for maximum bonding. I scrubbed them thoroughly with a rag soaked in Denatured Alcohol (available at hardware stores). This removed lots of dirt, grime, dye, shoe polish, and the topmost layer of rubber from the soles… I tend to be overly thorough. The boot on the right has been cleaned, the one on the left has not.
Once you have the basic shape, it’s time to fine tune it. Tape the WF toe directly to the boot where you intended to attach it. Molded the edges of the WF to fit into the groove between the sole of the boot and the leather, to give it a better hold. Remember: Periodically check how the Toe will work when you walk – make sure it won’t get knocked off when you roll your foot forward, and that there’s an allowance for how much the top of the boot stretches with your foot in it. NOTE:A little tightness here will haunt you down the road. I spent as much time shaping the WF to match the boots as I did on getting it into the curl shape, if not more. Next, smooth out and reinforce the toes as much as possible with more WF. Use the scraps you saved to cover up any wrinkles or weak points.
Remember: The smoother you can make the Toes now the less finish work you’ll have to do to make them really nice later. However, keep in mind the thickness of the fabric that will go over them – I put more effort into this part that was strictly necessary.
OPTIONAL: After the shaping was done, I further smoothed out the Toes. This might not have been necessary as I later glued fabric over the top, but it made the final piece look more polished than it otherwise would have.Use acrylic caulking to smear/spread over the seams and dips (available at hardware stores – it doesn’t matter what kind; cheap is fine). It is possible to sculpt caulking almost like clay, if you are careful and patient. Keep some water handy to get your hands wet, and smooth it out as it starts to tack up/dry. A hairdryer or heat gun can help this process along. NOTE: Be careful not to get things too hot – the caulking will bubble, or the WF will deform again.
For instructions on the actual Boot Covers, I’ll refer you to the tutorials I followed myself:
NOTE: I safety-pin the boots to my bodysuit to keep them up, though you could use fabric interfacing to make the tops stiff enough to stand on their own; originally mine were tight enough to stay in place, but they’ve gotten stretched over time.
That’s it, you’re done! Make sure to let everything dry/cure properly, then go participate in some organized havoc.
Written by Steven Meissner, SoloRoboto Industries


